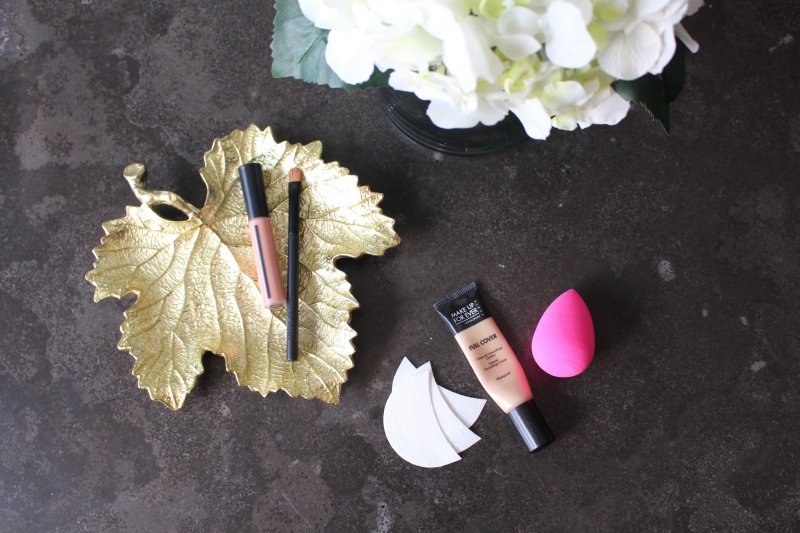
As most of you who have been reading my blog for years know, I tend to be a night owl and bit of an insomniac at times. For as long as I can remember I’ve found it difficult to get my mind to shut off and sleep. On the contrary, I often feel that I’m more creative at night and throughout my life I’ve used the evening hours to tackle projects, finish work, and write when it’s peaceful and no one else is awake.
I wouldn’t be myself without my late nights, but they do begin to catch up with me. The first thing I notice when I’ve been pulling a series of all-nighters?? My dark under eye circles.
I assume most of you have seen or heard about the red lipstick trick for dark circles?? In the video below I break down the trick behind this and how it works. Keep reading to hear my answer to the “red lipstick trick” and find out the foolproof way I hide my dark circles and sleepless nights.
Since this routine does add a bit more time to my makeup application, I generally save it for evening makeup or when I’m feeling really haggard. Occasionally I will utilize this technique and just add a bit of loose powder all over the face for a day look. Once you try it you’ll become addicted and find yourself working it into your routine each day!!
As I mentioned in the video above, everyone’s skin tone and dark circles are different so I recommend playing around with a color correction kit first to really discover which colors best camouflage your dark circles. Try this kit for a bargain value or this one if you’re feeling a bit more spendy.
Step One – Color Correction
Start with a light layer of primer all over the face. I like this one because it helps blur fine lines and enlarged pores while making my skin look mattified and fresh all day long.
Use the tiny brush attached to the Giorgio Armani Master Corrector in #1 Pink and swipe the corrector over any dark or discolored areas under the eye, on the eyelid, and in the tear duct area. Look at your eye area like a canvas… And paint the corrector on wherever you see flaws or discoloration. No need to blend yet… You should see tiny little lines of color all over the eye area, concentrated in the darker parts.
Take a small flat brush and lightly pat the stripes and swatches of the pinky-peach color corrector into your skin. You aren’t blending so much as patting the color around and making the lines of color less visible. After this step you should notice your eye area looking much brighter and less tired.
Step Two – Conceal
Run a beautyblender sponge under water, then squeeze out the excess with a clean towel. The sponge will be big, puffy, and soft. It will allow you to create a perfect airbrushed effect under the eyes.
Squeeze a bit of a creamy, yellow-toned concealer onto the back of your hand. This one in #6 is my absolute favorite and I’ve been using it for years. It has a light yellow tone that brightens while it camouflages any purple colors in the eye area.
Dab your moistened beautyblender into the little swatch of concealer on the back of your hand, then gently apply all around the eye area. Be careful not to rub too harshly or you’ll remove the color corrector. Simply dab the concealer all around the eye area, creating a beautiful airbrushed effect.
For extra oomph apply the concealer all over the top lid, inner corner, and under the eye… Then add a little concealer in a triangle shape from the outer corner of the eye, down to the middle of the side of the nose, and back up toward the inner corner. Be sure not to bring color onto the nose, you just want it coming up to the area directly under your tear duct. This will give a beautiful brightened effect to the entire eye area.
Step Three – Protect
Many women apply their eye makeup first, then wipe any fallout from eye shadow or mascara and complete the rest of their face. For some reason, this technique just doesn’t work for me and I prefer to do my corrector, concealer, and foundation first before adding any color products to my eyes and cheeks.
If you’re like me, there’s an easy way to protect all the work you’ve done to hide those dark circles!! These genius little eye pads can be easily applied under the eye before starting your eye shadow, eye liner, and mascara to ensure no dark products end up under your eyes. I like to take one out and remove only one adhesive area, then rub my finger over it a bit so it’s not too sticky. I gently stick it underneath my eye and allow it to catch any fallout from my products.
Don’t forget the Nordstrom Anniversary Sale is going on from now until August 3rd. Find details on how to shop and my favorite sale picks in my post here. My all-time favorite sale of the year!!
Let me know what you get from the Nordstrom Anniversary Sale… And tell me if you try my dark circle trick!!


I've always wanted to get that Make Up Forever concealer palette, for like 4 years now, just haven't splurged on it yet. I hadn't even heard about the red lipstick trick until today… I don't think I would want to do it since I have oily skin, plus live in Texas, so it's very hot right now, I would just worry all day that the lipstick is showing, lol!! I love your tips and product recommendations!!
Love this post! I suffer from terrible discoloration 🙁
Snowtember.com